
Sunday, November 13, 2011
Total Destruction
We waited until a bit late in the project (to make sure we had enough mulah) to tackle tearing down the garage. Unfortunately, we can't locate a before picture! However, you can see that there isn't much left anymore!

Thursday, October 20, 2011
Snow White and the Seven Painters
With the trim complete, Keri and I poured over paint wheels to find just the right combination of colors. Who knew there were so many shades of "white"... While we didn't exactly go out on a limb with our color choices, we wanted to do just the right colors that were just a few degrees off of standard.
BTW, it took some time for me to get this post up because I couldn't stand to be in the house for more than about 15 seconds when they painted on a given day. I don't see how the painters have any brain cells left and after talking to them my suspicions were confirmed.


We have always like the Benjamin Moore line and didn't see reason to change on this project. For the trim we selected Snow White (2122-70). In the kitchen the walls are the exact same color. For most of the rest of the house, we used Classic Gray (OC-23). For the dining room we wanted to go just a bit darker with La Poloma Gray (1551). I know, white and gray, pretty risky!
Classic Gray
Snow White
La Paloma Gray
As I have learned with colors now, I have no idea if these actually match the way the color actually looks on the walls, but you tell me.
 |
| This is the view from the front door in. You can see the snow white trim and classic gray walls. |
 |
| Living Room |
 |
| La Paloma Gray in the Dining Room. |
 |
| This is the snow white on snow white in the Kitchen. |
 |
| More white...Keri will enjoy keeping this all clean. |
 |
| Master Bathroom. Hopefully a new post will soon feature sanded and very darkly stained wood floors. That's not a veiled way at saying the job is already done and I will be putting up pics soon. Rather, I hope it actually happens so that we can move in! |
Sunday, October 2, 2011
Getting Close
The trim carpenters are almost finished and the house is really starting to shape up. I would say the only downside to this is that time is now officially creeping by second-by-second. We are thinking we will move in by the end of October, with the garage tear down and rebuild completing after we have already moved in.
 |
| You can see we now have all the doorways cased. This is the laundry room looking in to the kitchen. |
 |
| Cabinet doors! This is the built in pantry. |
 |
| Range to slide in. |
 |
| Crown molding and new window trim in Hattie's room. |
 |
| Master bathroom vanity. |
Sunday, September 11, 2011
Trimming Away
The trim carpenters have been on site for quite a while now and we are really starting to see the fruits of their labor. When I see someone who actually creates something with their profession like these guys do, I start to wonder exactly what it is I accomplish as a lawyer...
These pictures are kind of a mid-way update of the trim carpenters' work.
These pictures are kind of a mid-way update of the trim carpenters' work.
 |
| A floor shot of the table saw to see our living room turned in to a millworks shop. |
 |
| The stove will go in the middle here, with a hood vent built in above. |
 |
| This is a shot of our pantry. I pulled the roll outs all the way out to show off the full extension mechanisms. You will also see our smallest employee taking care of the most difficult items in the house. She is very volatile and if disturbed, is liable to lay face down on the ground without saying a word. Artists... |
 |
| Another shot of the cabinets surrounding the stove, this time with drawers installed. Doors are on their way... |
 |
| Cabinets in the utility room. The washer and drawer will go below the upper cabinets. Above the lower cabinets we decided to do exposed floating shelves, which are yet to be installed. |
 |
| This is our coatrack/mudroom piece in the utility room. |
 |
| Fridge goes on the left, sink below the windows. More cabinets to come in a couple of days. |
Tuesday, August 30, 2011
A Little Bit of Paint Goes a Long Way
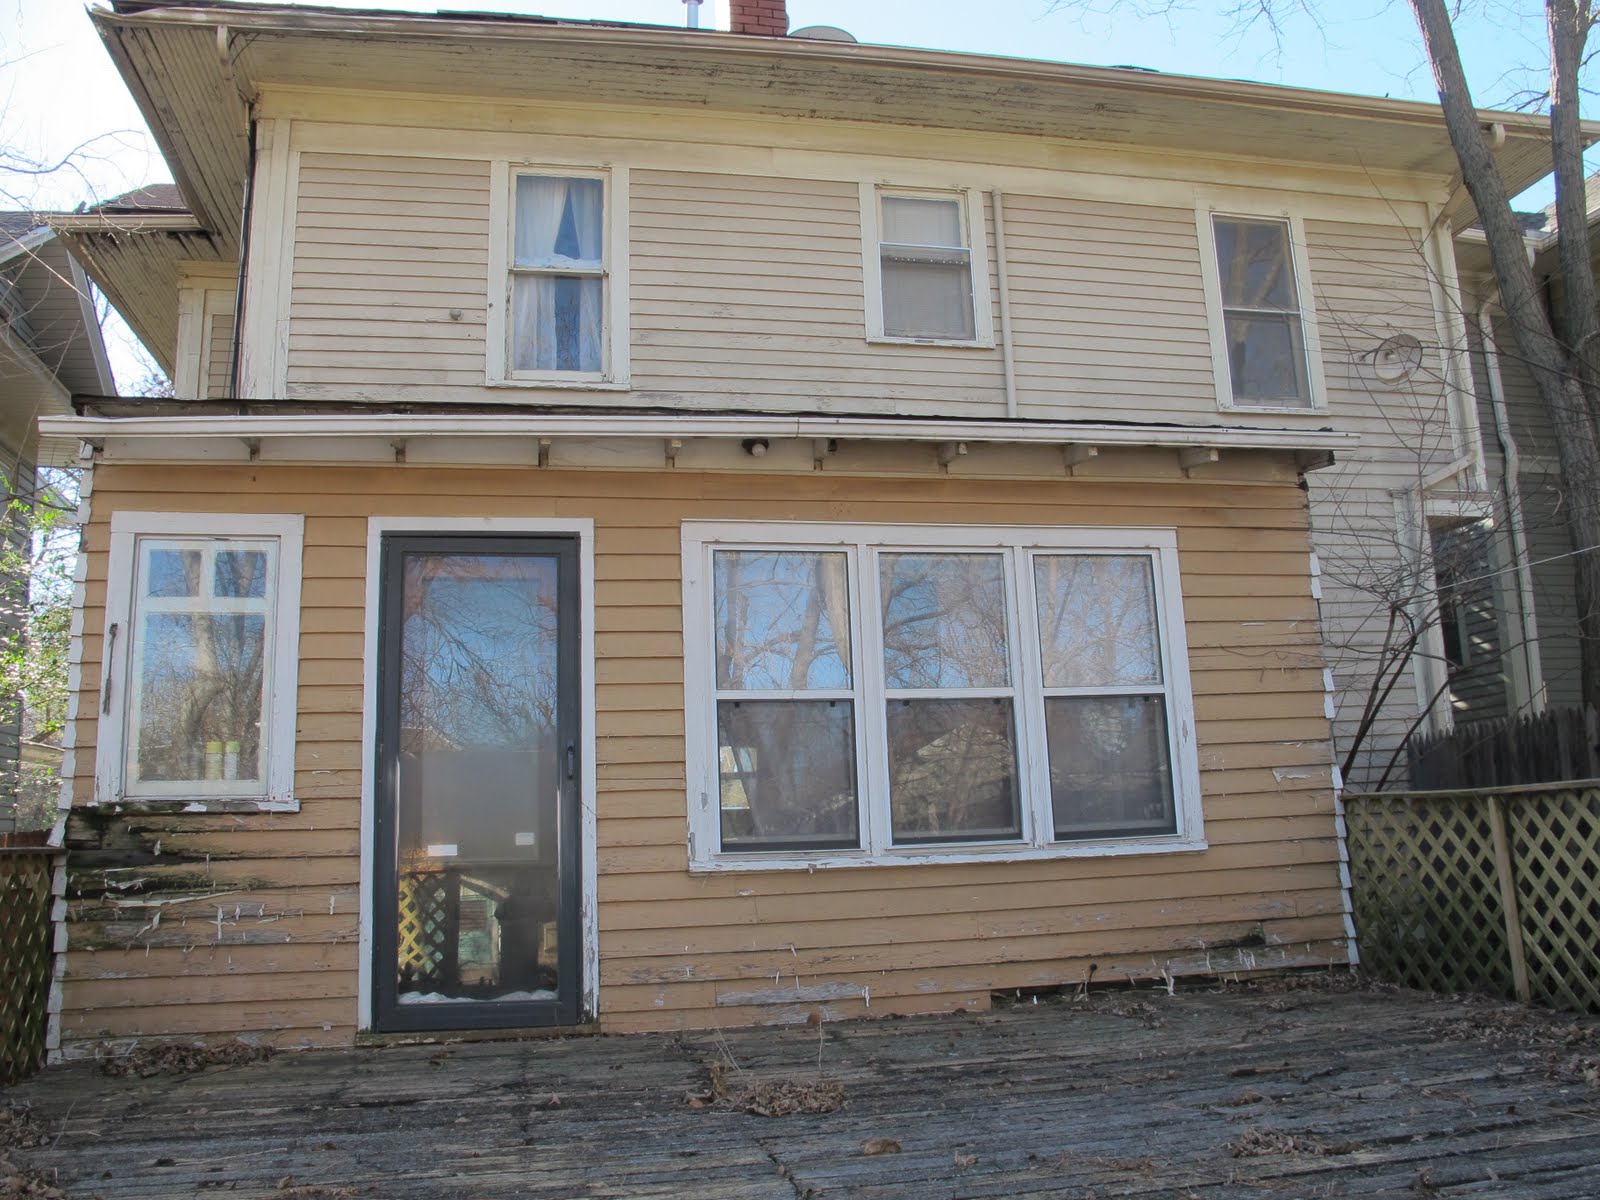
So much of the recent work has been on the inside of the house, but we finally saw vast improvement outside. The past couple of weeks we have seen the house undergo an extreme makeover with the simple addition of new paint. Not too many words needed for this before and after.
 |
| BEFORE |
 |
| BEFORE MINUS TREES |
 |
| MIDWAY WITH PRIMER |
 |
| AFTER! Note the Porch is also completed! |
Wednesday, August 17, 2011
Tile
We definitely busted our budget when it came to tile, but I think it will be well worth the investment. Our tile guy, Delbert, was slow but meticulous. I was afraid it would take six months for good ol' Delbert to git r' dun, but he finally finished and we are thrilled. We tried to keep things looking like they might have in 1910, but its always a difficult task to stay contemporary without looking strange in a 100 year old house.


 |
| Kitchen and utility floors. |
 |
| The same floors extend to the guest bathroom adjoined to the utility room right off the kitchen. |
 |
| This is the bathroom we call "Hattie's Bathroom." If you saw our last house, it's pretty similar to the white subway tile we used previously, in fact 100 square feet are from our last bathroom leftovers! This time we stopped it part way up the walls with a chair rail at about 36 inches. |

 |
| Just a reminder that this was what it used to look like... |
 |
| This is our master shower. We went with white marble subway from floor to ceiling. |
 |
| We went with a white penny round (not yet installed) for the floors. |

Tuesday, August 16, 2011
The Backyardigans
Again I have fallen asleep at the wheel when it comes to updating this blog! But what can I say, Keri no longer has an appendix and that is, not surprisingly, a time intensive project...and just for clarification, we hired professionals to handle that one too.
The backyard originally had an oversized deck that was structurally unsound, to say the least. We opted for a concrete patio that should have a longer life and not require annually staining.

The backyard originally had an oversized deck that was structurally unsound, to say the least. We opted for a concrete patio that should have a longer life and not require annually staining.
 |
| Haven't looked at some of these in a while, so it's crazy to see all these trees in the backyard that are now gone. |
 |
| The pathway at the bottom of the picture runs to our driveway. This should be the route to the car everyday. We will have a short fence running along the edge of the driveway too. |
 |
| The finished product! If you look close, you can tell Keri took this picture with Hattie on her hip. |
Saturday, July 9, 2011
Starting to Look Like a House Someone Might Live In...
It's been a long road to reach this point, but the sheet rock is in! At this point it looks like we might actually be able to live in the house someday. We picked out tile this week and the trim carpenters should be coming soon too.

 |
| Dining room bay windows. |
 |
| The kitchen sink will be beneath these windows. |
 |
| We are leaving the brick exposed for a little original charm. This is a view of the kitchen into the utility room. |

 |
| Master bathroom taking shape. Entrance into the master closet on the left, straight ahead is the door into the area with the toilet and shower. |
Tuesday, June 28, 2011
Foam Party
Believe it or not, homes in 1910 were not built with insulation. It was straight from siding to the studs. Of course they didn't have central heat and air either, so there wasn't really a need to keep the heating and cooling bills down...
Well, we took the plunge on spray-in foam insulation throughout, including the entire apex of the roof in the attic.

Well, we took the plunge on spray-in foam insulation throughout, including the entire apex of the roof in the attic.

 |
| You might notice the sheet rock stacked in the middle of the room, coming soon... |
 |
| It's crazy how the house has been cool, believe me, with the insulation, even with all this heat. Imagine once the central heat and air starts flowing! |
Friday, June 24, 2011
Can't Wait to Take the Annual Christmas Pic
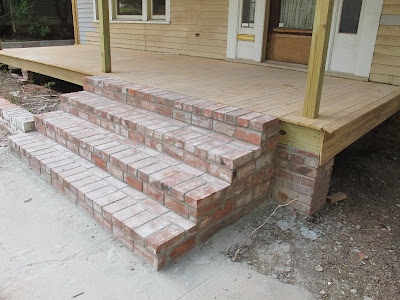
As you may recall, our annual Christmas card photo has been on our porch in the arch of our old tudor style home. From the first day we saw the new house in Mesta, we knew we would make our tradition the brick steps in front of the house. Unfortunately, the bricks were in horrible shape and needed repair. We think the brick guys did a great job in salvaging the bricks, check it out.


 |
| All original, 100 year old bricks! |

Sunday, June 5, 2011
Re-Charged
Here is another set of pics that aren't so exciting to see, but make me sleep better at night. As you may recall, we had a fire in our last house due to poor electrical installation. For this house, we ripped out the old stuff and put in the best you can get. I will spare you a shot of every new wire and give you some example shots.
 |
| New light switch boxes in the master bath. |
 |
| Here is a shot of one of the can lights we are using. We went with the smaller 4-inch variety rather than your standard 6-inch. |
 |
| It may be hard to see, but this shot shows the can lights in the kitchen and also two spots for the pendant lights we will use over the island. |
 |
| The TV will hang between these windows above the fireplace. |
 |
| Here we used the larger can lights for the master closet. Trying to make sure I quit wearing brown socks with a black suit... |
Subscribe to:
Posts (Atom)